

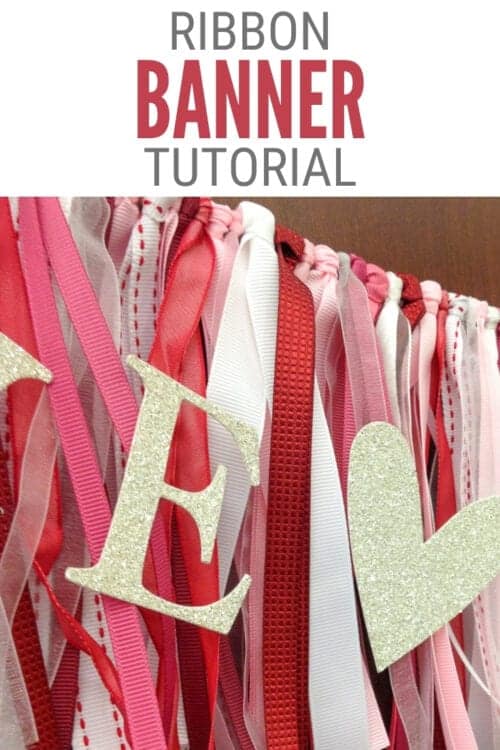
Use up that ribbon stash to make a simple ribbon banner for your next celebration. Below is the Ribbon Banner step-by-step Tutorial.
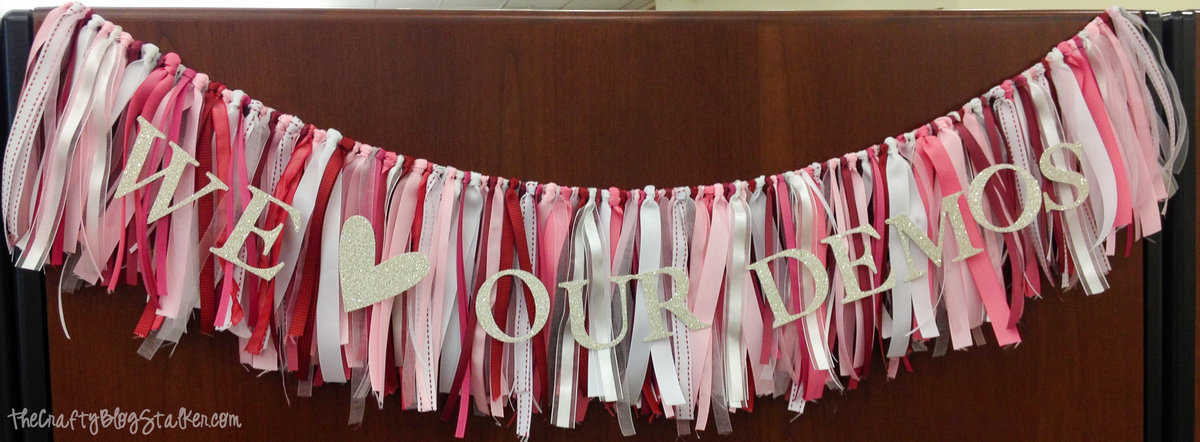
Every year the company I work for has a big convention for thousands of demonstrators from all over the US and Canada.
They come into our building as a part of the "Home Office Tour" and my desk is the very first thing they see as they come in the door. So, of course, I made them a fun banner to say hello!
Supplies You'll Need to Create this Project:
Some links may lead to similar items when the exact item is unavailable.

Craft Tutorial:
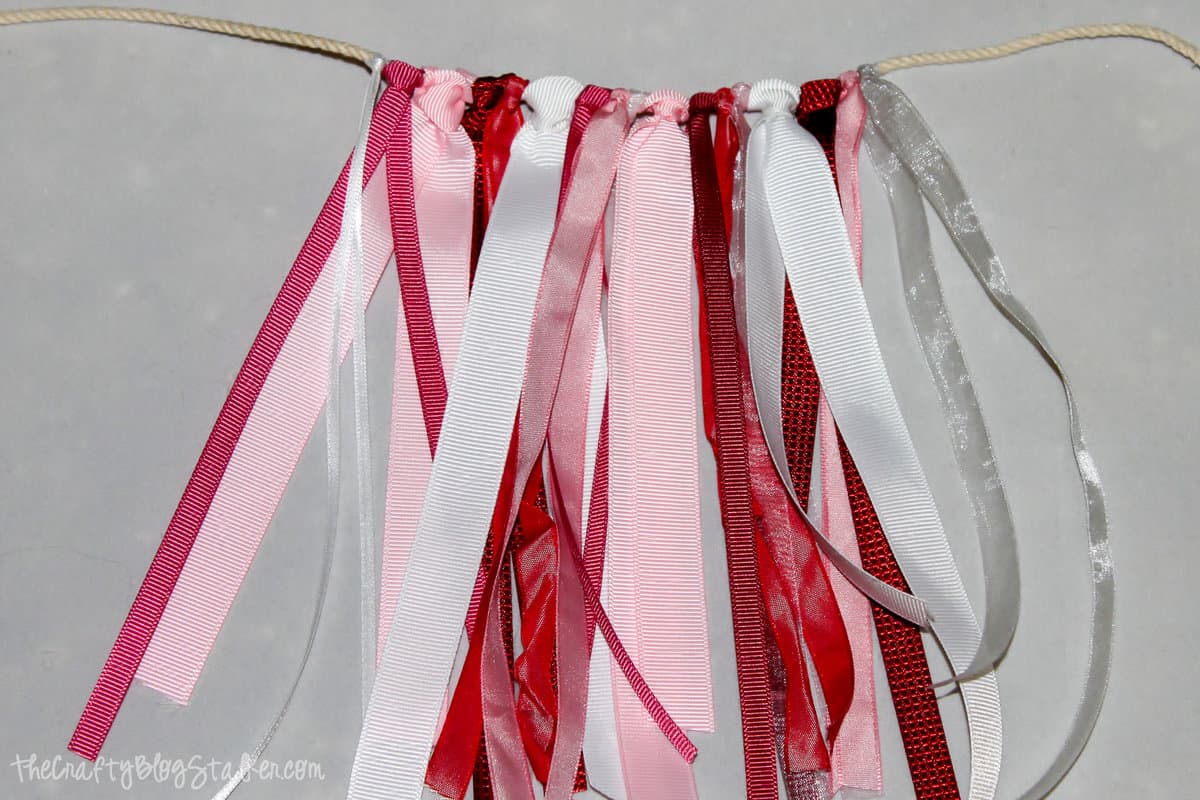
This banner was created with 13 different ribbons with different widths and textures. You can use as many or as few ribbons as you would like.
Cut each piece of ribbon to about 12 inches long. This gives about a 6-inch tassel. You can cut longer or shorter depending on the look you are going for.
To tie the ribbon onto the rope, tie each strand into a simple slip-knot around the rope.
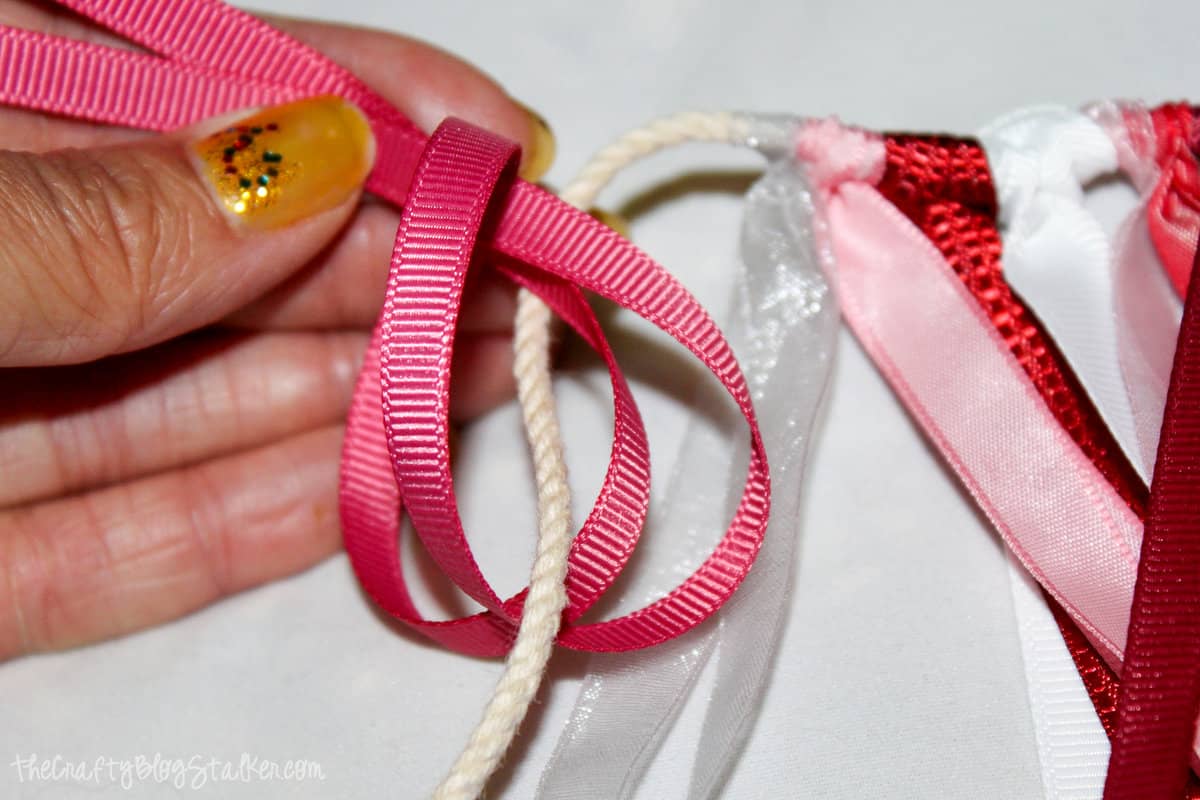
Make sure to tie them all the same way so they will look more uniform along the twine.
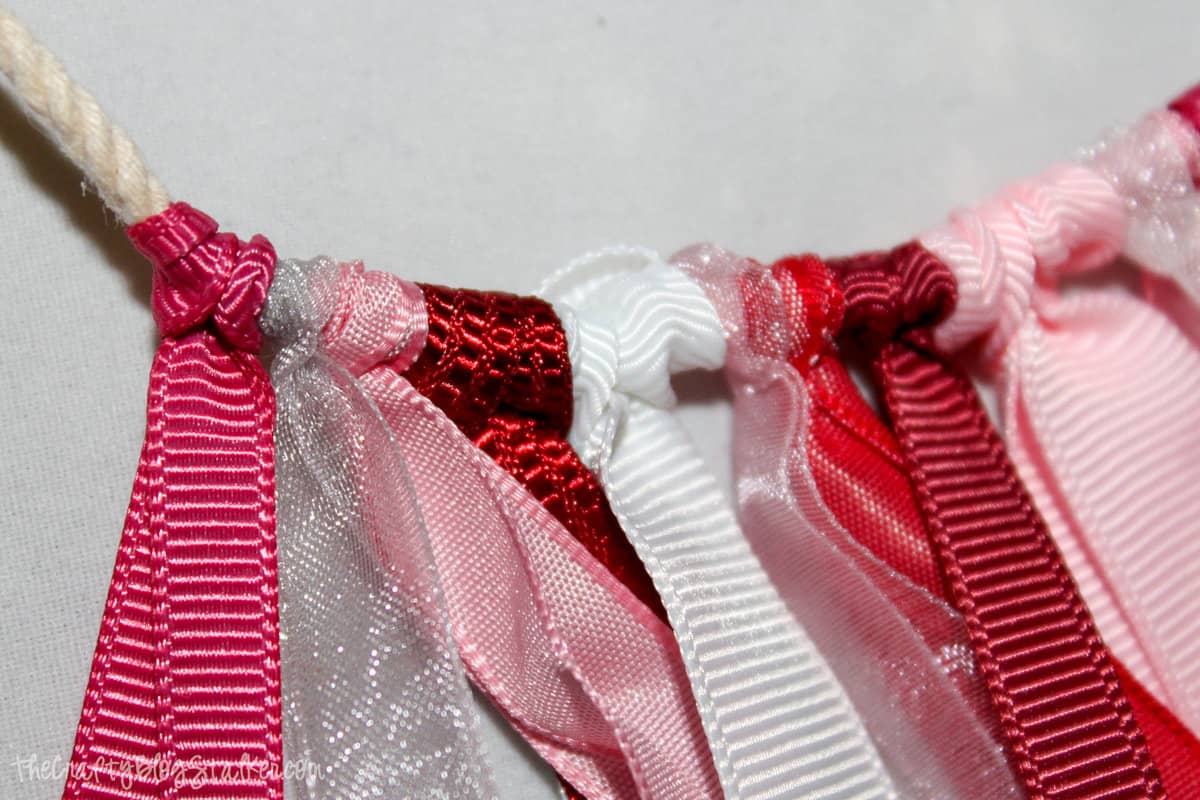
Keep adding ribbons until you are at the length desired for your banner. Pretty easy peasy, right?
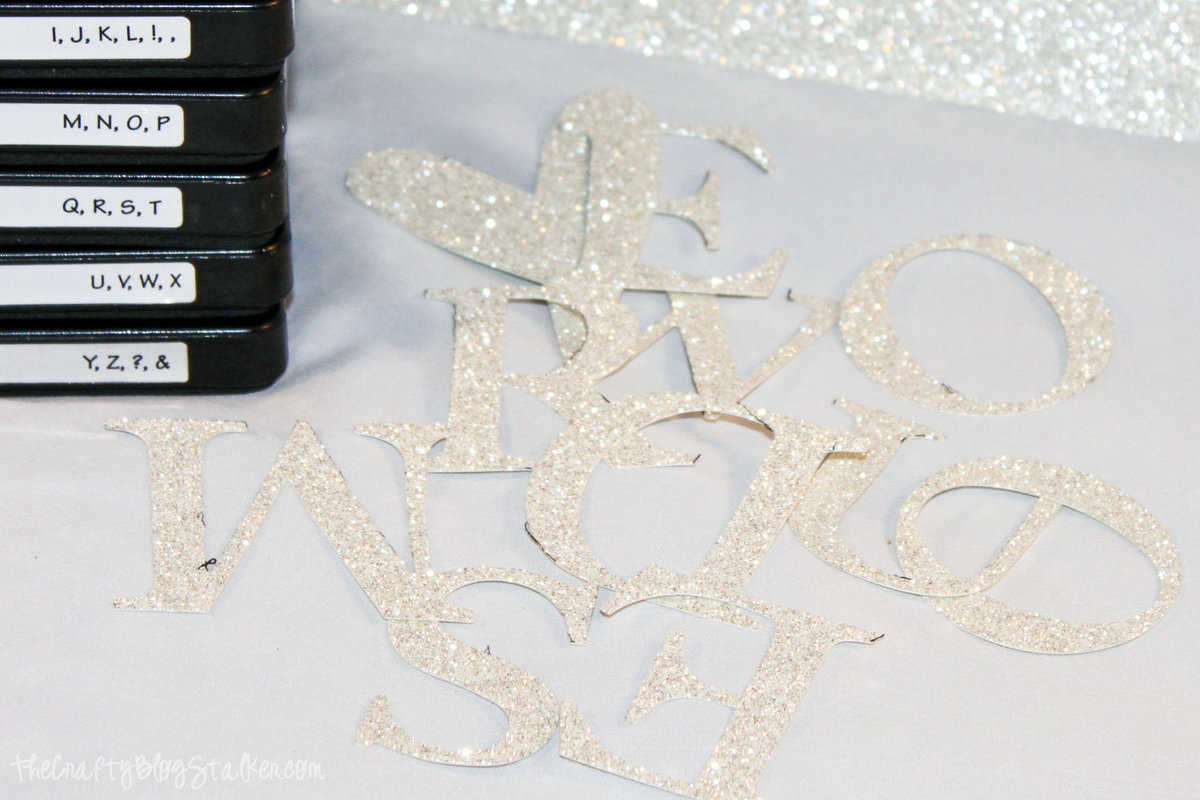
Cut the letters using a Big Shot, Alphabet dies, and white glitter cardstock.
On the back of the letters, glue a paper clip using E6000 glue.
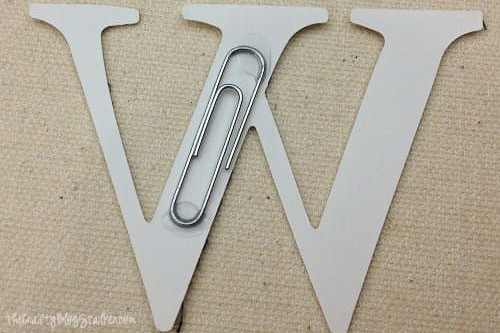
Put the letters on the banner using the paperclip to attach to a strand of ribbon. Using paper clipped letters makes the ribbon banner interchangeable and can be used with different sayings and words.
If you love this tutorial, please give it a five-star review and help me share it on Facebook and Pinterest!
Crafting Essentials
- The Cricut Cutting Machine is easily my favorite crafting tool. We use it in so many of our tutorials!
- These MakerX Crafting Tools are perfect for keeping in the craft room and are always ready when needed!
- This Fiskars Paper Trimmer is easy to use and cuts nicely without frayed edges.
- These Scotch Precision Scissors cut like a dream, and you get multiple pairs in a pack!
rebekahdawn
How cute! I love it!
Holistic Homemaking
This is BEAUTIFUL! The finished product looks so articulate and detailed, but it's so simple to do (my kind of project)! Thanks for sharing at the Happy Hello!
Camille
Super cute! Love it 🙂
Tulip TrueAim
Beautiful! I just made a mobile with this technique. I didn't think about making a banner. Stopping by from Salt Tree. Hope to see you at True Aim. Thanks for the crafty idea!
rebecca
This is a great idea! I think I'm going to have to use this idea in my up-coming baby shower
Toodie
I love it! Such a good idea and I love the paperclip idea to make it reuseable!
Elena @ La Petite Vie
Love the banner and glitter letters! Thanks for the great tutorial!
Ang
Hello! found you on Link it Up Thursday - this is so awesome! I love it!! I hope you'll come visit me at jugglingactmama.blogspot.com 🙂
quintonwench
very cute and something even i could do without getting frustrated!
Britni @ Hubby Made Me
So pretty! Love the glitter letters too. I made one with yarn once, but ribbon is a much better idea! I'd love if you shared this at my Throwback Thursday link party. Hope to see you there! Thanks so much for sharing. 🙂
Christine
LOVE IT!!! The paper-clip on the back of the letters is GENIUS!
Thanks so much for sharing this at The DIY Dreamer.. From Dream To Reality!
myric andreasen
Thank you so much for sharing your lovely banner idea! So creative!
xo
Myric
Nicole@Show Off Friday
Very pretty! I'm glad you stopped by. Have a fantastic week!
Abigail Guegain
Very very cute!
Erin
Beautyful.
Sara @ My Merry Messy Life
This is so creative, Katie! I never would've thought to make a banner out of ribbons. Must've been a hit at your event. Thanks for linking up at Hookin On Hump Day!
Sara @ My Merry Messy Life
Katie, I chose you as one of my favorites from Hookin On Hump Day! Congrats!
Stacia Liechty
Super creative! I especially love that you made the letters interchangeable. I'm here from Once Creative Weekend, and I too am a crafty blog stalker. I just became your newest follower and would love it if you popped over to my blog to take a look around. If you like what you see, follow me too! Thanks again for the great idea!
Glamorous Mommy
This is just darling!! I love the paperclip tip, great way to change it up!! FOund you via Southern Lovely linky party :)-- Fotini
Pretty Shabby UK
I would love it if you would share this post on the Waste not Want Not Wednesday @ Pretty Shabby UK! I really think my readers will enjoy it!
Ritchil Shafer
This ribbon banner looks fabulous! Pinning!
Scrapbook
It's so beautiful, I love this great ribbon!
Claudia
Lovely idea! Will try making this on the weekend I guess
Katie
I am so glad that you like Claudia! I would love to see your version - send me a picture when you're done.